The Big Three basic calisthenics movement categories are push, pull and squat. From these simple groupings can be found an endless variety of movements with every difficulty level imaginable and all you need for a lifetime of progress. Pushing exercises include all variations of push ups and dips. Squats include all manner of one- and two-legged varieties made more or less difficult by varying the foot position, number of legs involved (only two choices here), whether or not you leave the ground, surface elevation, and just about everything else. Pulling exercises include varieties of pull ups and body-weight rows. In today’s challenging times we have two big problems: we need exercise more than ever, and we are stuck at home. NO PROBLEM AT ALL! Home is my favorite place to exercise! Pushing and squatting are easy; they require only the ground or the floor. Pulling is a little more difficult as you need to be able to pull yourself up using some kind of external object. But don’t worry, there are plenty of options available in your home. In preparation for a series of introductory calisthenics classes that I am offering, this post will take you through many of the pulling alternatives that you can do from your own home with minimal equipment. You will find more than you need here. In some cases I will recommend what you might want to buy and provide the links. But honestly, you can get a good workout without having to buy anything, and a great one with endless opportunities for progression with expenditure of $40 or less and no installation.
Body-Weight Row
Also called the Australian pull up, this is a basic pulling movement that anyone can do, regardless of your strength or experience. This would be the place to start. It is called the row because the movement pattern is the same as what you are doing with a set of oars while seated in a boat. You can also think of it as an inverted push up. So for this movement you are underneath a bar or some other object that you can grasp with your hands. If your legs are straight, then your heels are planted on the ground; if they are bent, then your feet are planted on the ground. Generally speaking, the closer to horizontal your body is, and the lower the bar is to the ground while still allowing full extension of your arms, the more difficult the exercise is. If you are able to rest your feet on an elevated object and your body is completely parallel to the ground, then that would be the most difficult version if using a straight bar. An even more difficult version can be performed using gymnastics rings or suspension trainers, which allow your entire body weight to be lifted and do not require your feet to be touching anything. This will be explained later.
In terms of equipment, there are two options for rows: 1) a bar or object that is stationary and you can grasp with your hands and is roughly waist high and parallel to the ground, and 2) a set of straps or ropes (even a towel) that can be affixed to something like a tree branch or top of a swing-set or door. Both are good and the latter offers many more feet positions to make the movements easier or more difficult.
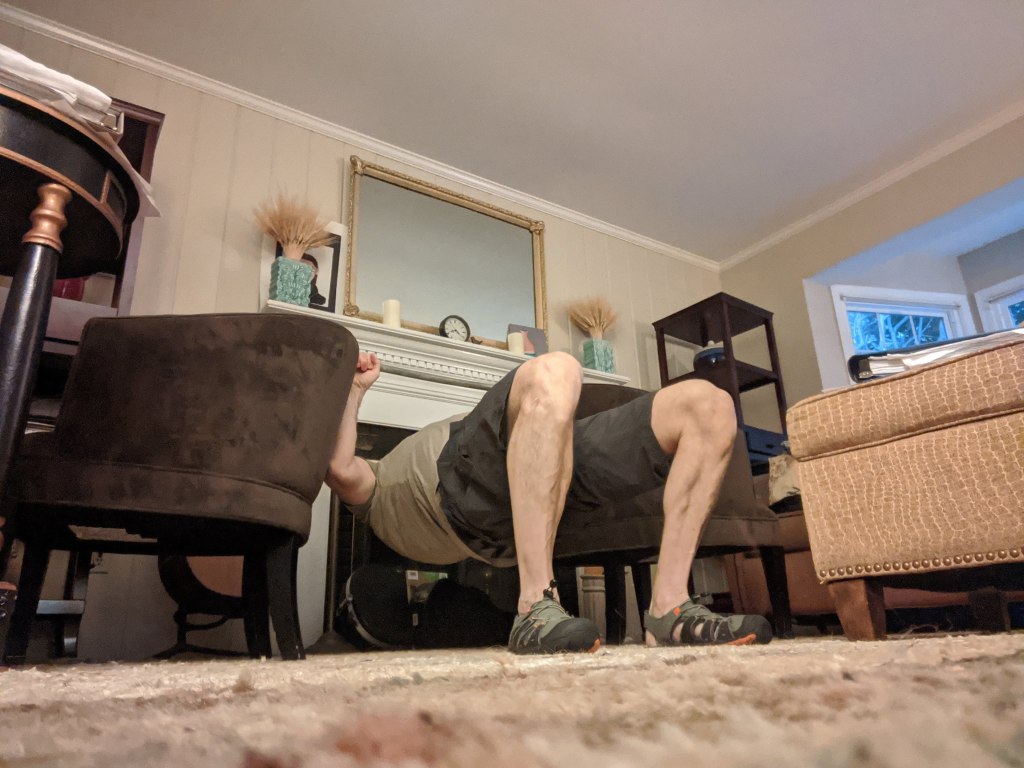
Here is an example using a piece of equipment you likely already have: a dining room table. Note that my knees are bent and so my feet are planted on the floor. This would be more difficult with legs extended. This is a great alternative because everyone likely has this equipment, but it can be challenging to crawl under the table and does require finger strength and resilience.
This video shows the exercise using gymnastics rings. These are probably the single best piece of exercise equipment that I own because I can use them just about anywhere and for just about any purpose. Here I show how varying your feet position, body angle, and distance from the center allow you to make the exercise more or less difficult. You can even use these to train for a pull up (discussed later), which is also shown here. Here are the rings that I bought.
I have also mounted my rings in the basement over the iron support beam, shown here:
And here are rows using a found object: in this case a rope attached to my kids’ swing-set:
Suspension trainers also work. I do not recommend TRX bands for this purpose, but I have been experimenting with a cheap alternative. That is to say, two nylon dog leashes and a set of door-way pull-up grips. Here are some examples of how you can use this solution, attached to various things in various ways. Note: I bought 6′ dog leashes, but I would recommend shorter. Thicker is probably better. Four foot would be best.
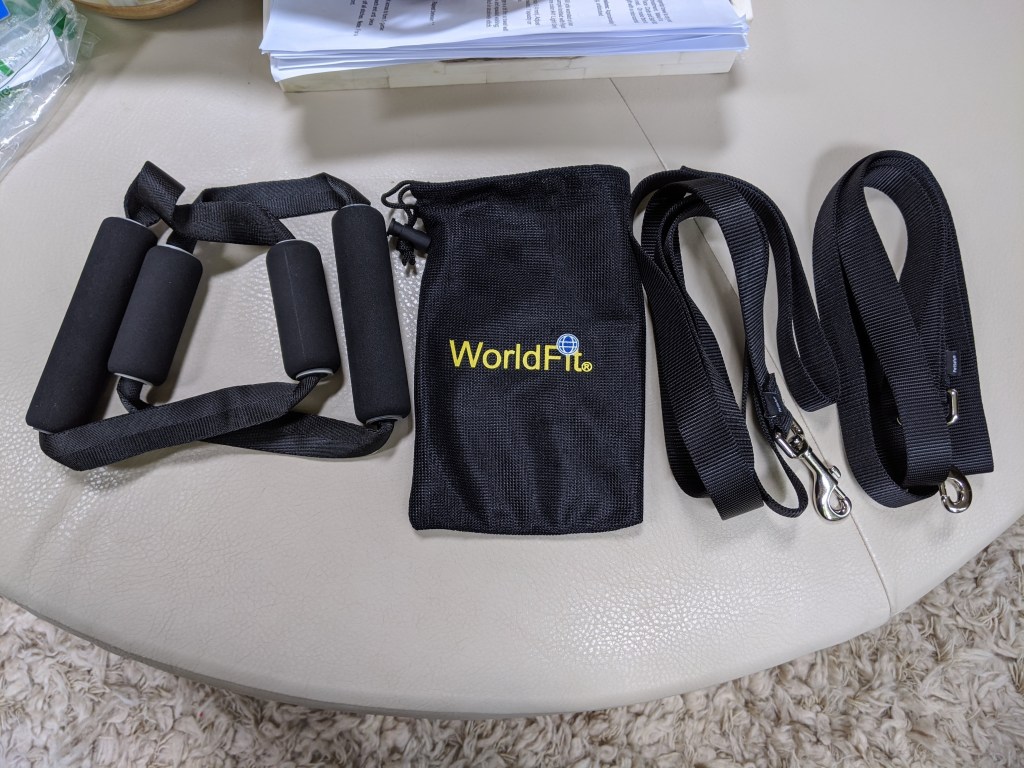

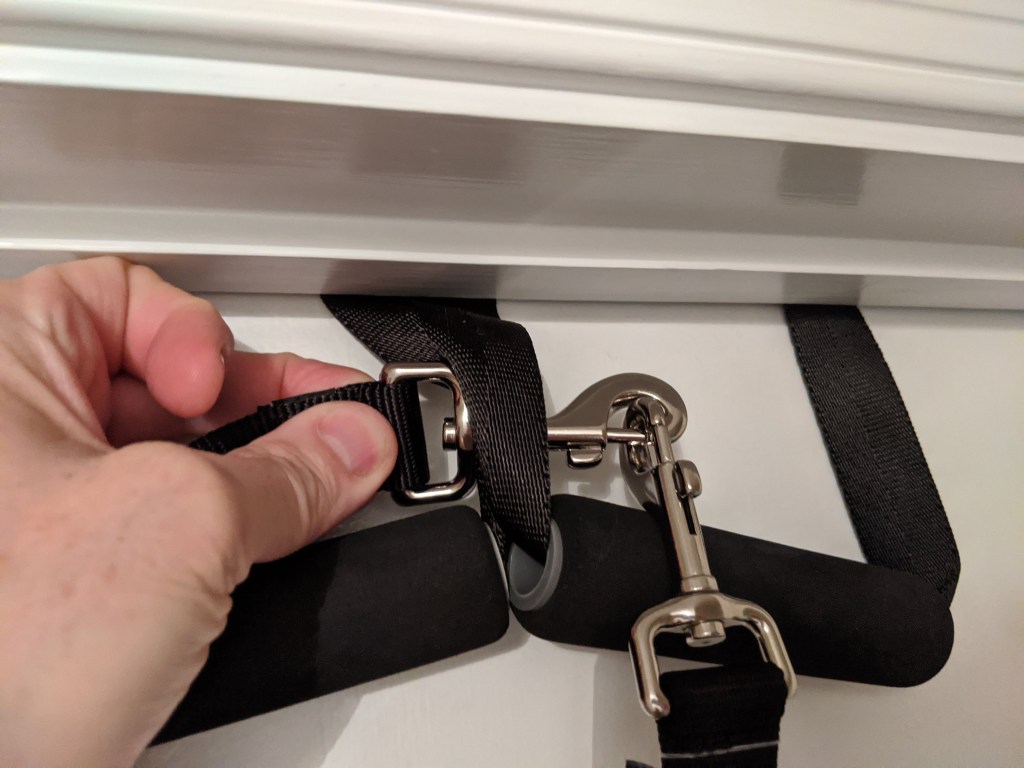
Here are the dog leashes attached to the door pull-up grips.

Here are the leashes attached to a tree branch.

And here they are attached to the swing-set.

Make sure the object you are attached to is strong and stable. It is best if you can get under the straps or bar and can vary your angle.
The two chair solution – this one is a good one if you have the right chairs and the right stick. I originally tried it with folding chairs, which are probably pretty common, but they were not sturdy enough and the back was too slick to support the rod. You need to make sure the chair is sturdy such that you can put your weight on the back of it straight down and it will not tip. You also need a sturdy rod. This is an aluminum rod that I found in our basement. And the back of the chair is padded so the rod stayed in place. I have tried this before with a broom handle but it broke and the result was painful. I don’t recommend a broom handle.


Pull Ups
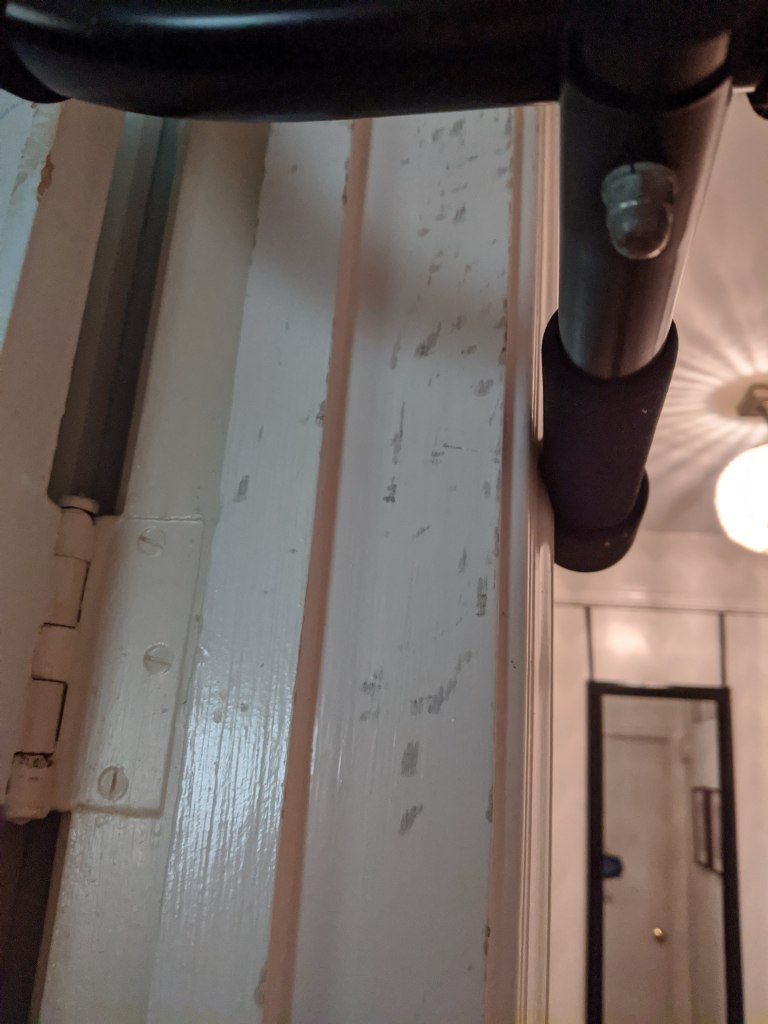
In my opinion, the pull up is the mother of all exercises. It’s quite a thing to pull yourself all the way up on something. If you can’t do one, it’s a worthy goal to get your first, and you can. The best way to get your first pull up would be to get really good at body-weight rows, described above. If you can do ten or more in good form, you are ready to train for your first pull up. I’ll cover the progressions in another post; for purposes of this discussion I will talk about options. You can get a cheap doorway-mounted pull up bar that works fine, but is permanent and will not allow the door to close. My favorite affordable and easy to use pull-up bar is the portable doorway pull up bar, like this one. Mine is shown below. They are very easy to pop in place.
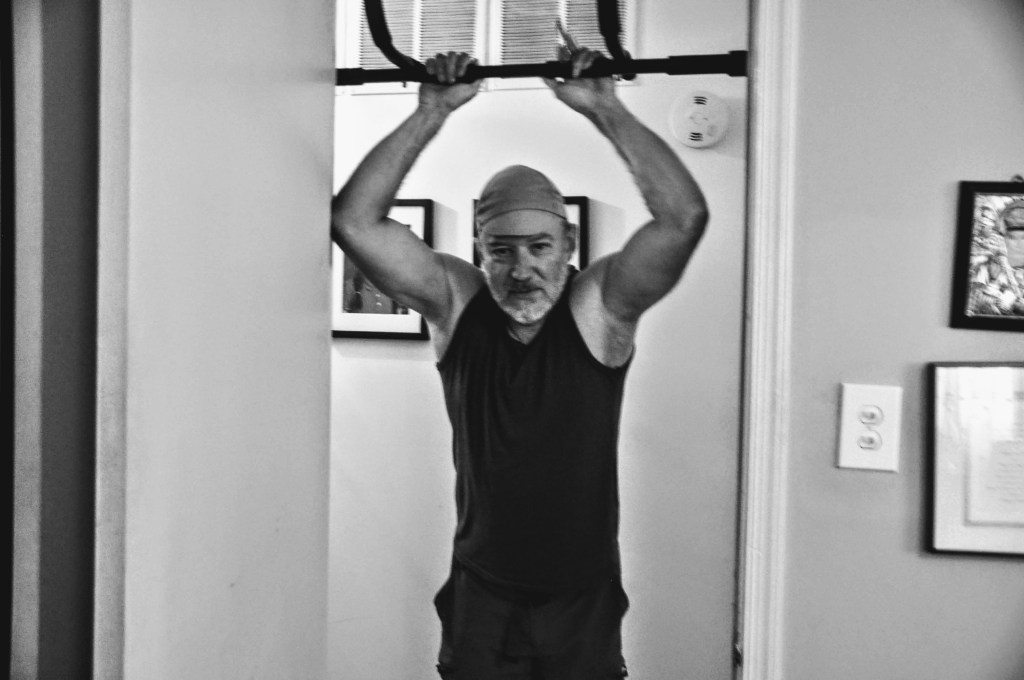

There is a small metal brace on the back side. Note that they are a little rough on the surrounding moulding.

I really like the gymnastics rings for pull ups, as they are so mobile and can be mounted in many different places. However, because of the stabilization required, pull ups are more difficult on gymnastics rings. But this has a plus side. The fact that the wrist can move and change positions throughout the movement tends to be better for the joints. Additionally, if you are training for your first pull up, you can adjust the rings to be about chest-height and then use your legs and feet to assist you in the movement. This is shown at :37 of the video below.
Note that if you wanted to spring for the gymnastics rings or suspension trainers AND the doorway pull-up bar, you could mount the rings on the bar and train rows and self-assisted pull-ups on the rings until you are strong enough to do pull ups on the bar.

Here’s my best set of pull ups, this time on the edge of my kids’ swing-set.
